


Blog
FridayAFM – What makes you sneeze?

Héctor here, your AFM expert at Nanosurf calling out for people to share their Friday afternoon experiments. Today I give you some tips and tricks on how to image pollen using AFM. Last week I was at the Le Forum des microscopies à sonde locale in Lyon, and a part from presenting the nanomechanics studies on lettuce (see the fridayAFM post here), I accepted a request from Veronique Lachaize and Arthur Gaveau (from A5 Science), to have a look at a “special sample” on a glass slide (in air and in liquid, and with whatever probe I want, but also with a soft probe from Vmicro).
Usually I recommend to know as much as possible about your sample before putting it under the AFM, and use the AFM only to get some quantitative data or to expand your knowledge a little bit more… but I have to admit that a “special sample” is a very appealing prospect. So I broke my own rules, and I put it under the AFM, and did the best I could: I imaged it with several different probes, with different imaging modes, and with different speeds, until I was convinced that what I saw was real and not imaging artefact.
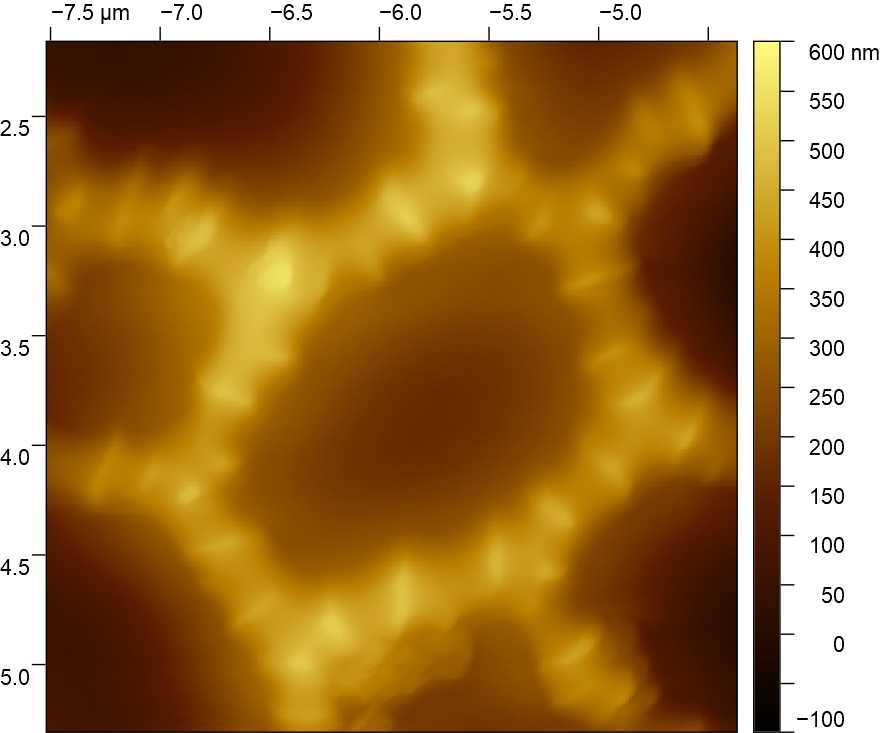
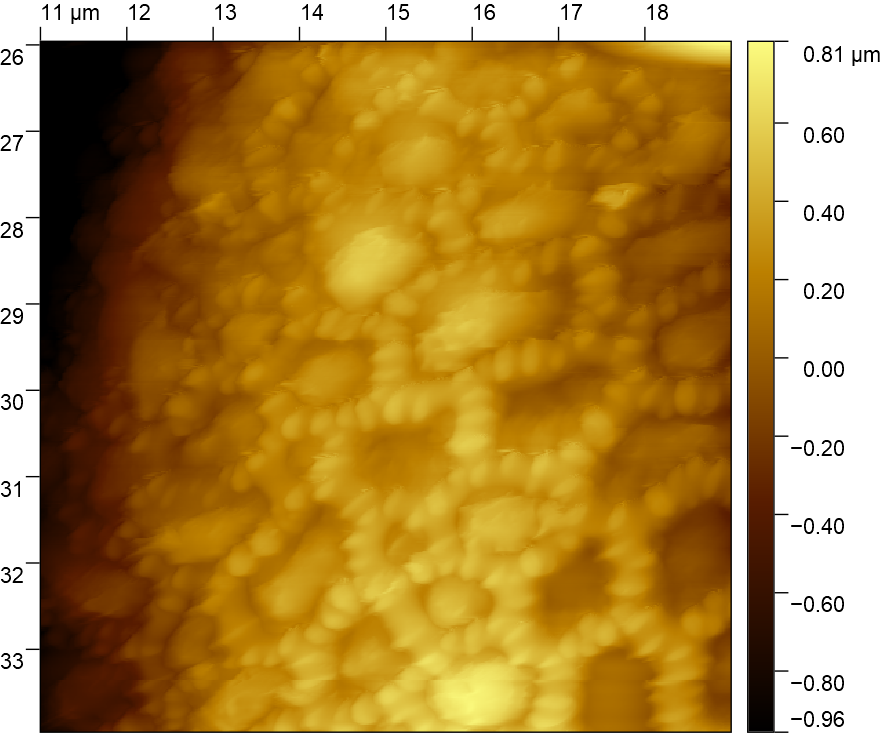
So… what it is? How it looks like? What it is I didn’t knew it just yet, how it looks like… this is the image I obtained:
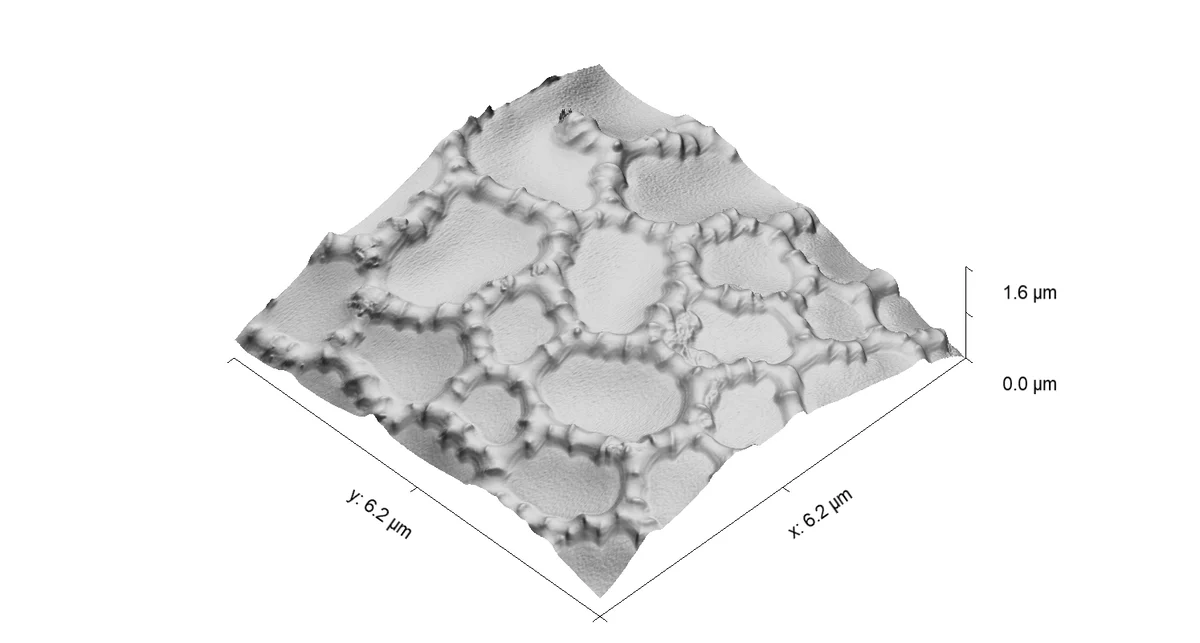
Maybe if I zoom out a bit it is more clear what it really is the special sample.

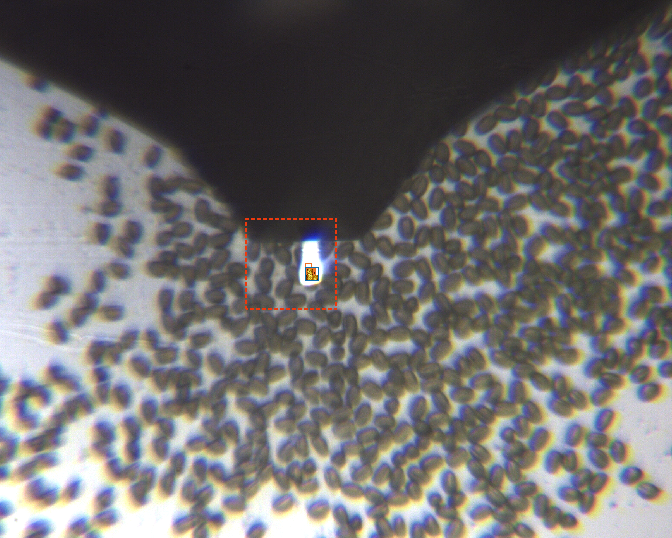
Pollen. The “special” sample was pollen attached to a glass slide using double-sided sticky tape. Now, from which plant in particular, it is not clear, because this “was collected leaving the glass slide on the window of the lab and capturing the pollen drag by the wind”. What was the trick to image it? Three main tricks: first one, I use a large excitation amplitude in WaveMode to make sure the probe detaches completely from the surface; second one, I adjust WaveMode to “touch” with a maximum force of about 10 nN, thus being quite gently; and last trick, I imaged areas where the grains were closely packed together, so the grains will not rock sideways because the neighbor grain holds it in place.
Note: In WaveMode it is possible to image the sticky tape surface, because the contact area of the probe is small and it is not indenting a lot on the tape, but in general, the best thing to do it is to avoid imaging the tape surface.
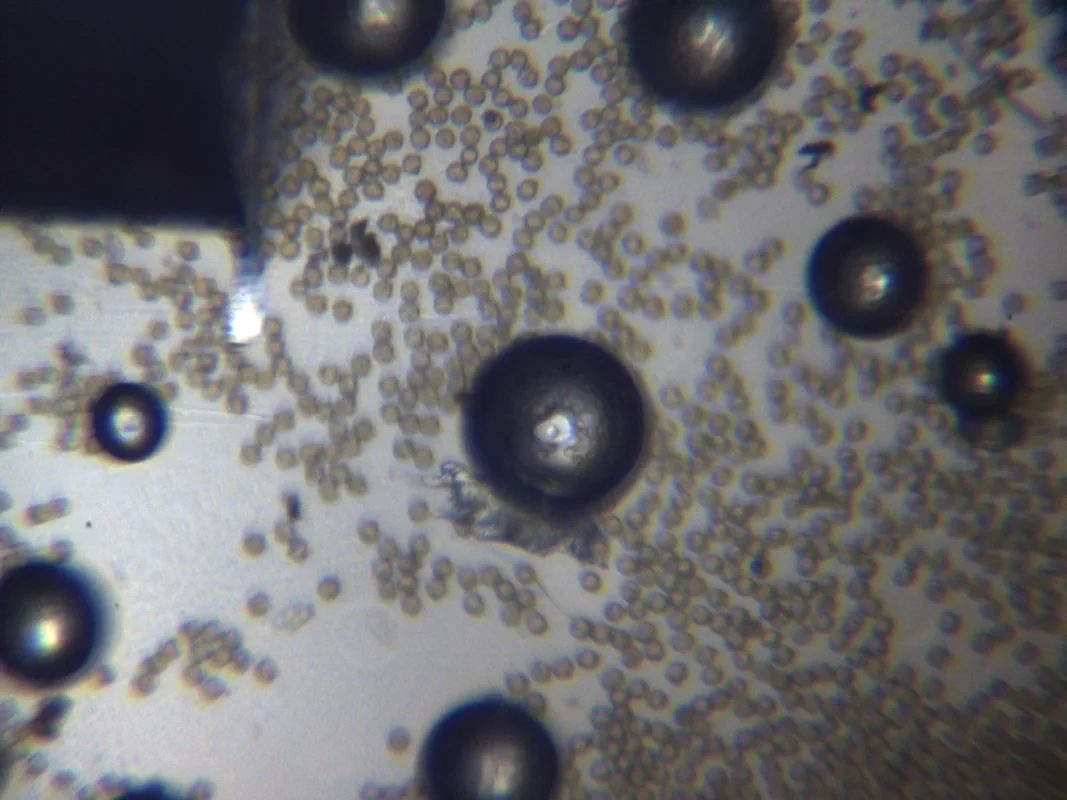
Note that while there are several ways of containing the liquid to keep the sample submerged while doing AFM imaging, in this case, I just used a droplet which I put on top of the glass slide. Too small and it will not be enough to wet the probe and probe holder, too large and it will splash and cover the whole glass slide and become a thin layer.
Gosh, can it be more difficult? Yes. In this case, imaging had an additional difficulty, because the glue keeping the pollen in place was dissolving and the pollen was becoming loose. But I managed to take one or two images and the result is quite nice because you can see pockets of trapped air on the surface of the pollen.
Is this intentional to prevent the grain becoming soaked in water? Does it help floating?
Can we use it to study the water-air interface? (an old project of mine if you remember the fridayAFM about rose petals).
Let’s recap. Pollen is everywhere these days, in your AFM also? At least on mine. While pollen is cool to study, its shape can be quite heterogenous, and most of pollen grains have large spikes. In this case it didn’t had spikes, but deep pockets, which can easily lead to tip artefacts if not using high aspect ratio probes (such as the ones from Vmicro). Imaging on top of a double-sided tape is tricky, but possible, however, it is good if you look for grains that are confined by other grains, and if you avoid touching the tape with the probe. Adding liquid is interesting, and can lead to situations like the trapped air pockets, however, it can also lead to glue dissolving, and this can limit the time available for imaging, or to contamination from the glue residue. I hope you find this useful, entertaining, and try it yourselves. Please let me know if you use some of this, and as usual, if you have suggestions or requests, don’t hesitate to contact me. If you want to learn more about cell mechanics, don’t forget to check our new application note on how to do complex nanomechanical experiments using our Spectroscopy Plus feature for the DriveAFM: Interrogating Cell Mechanics with Spectroscopy Plus

